

Create a Handwritten Electronic Signature with a Camera Phone
The Problem: How Do You Sign a Cover Letter that is Being Electronically Submitted?
Many employers now require cover letters and resumes to be submitted electronically. However, this presents an obvious problem: how do you sign your cover letter?
There are a few obvious but unacceptable solutions:
- Typing your signature with a cursive font like this: John Doe. This looks incredibly tacky and unprofessional.
- Typing /s/ then your name like this: /s/ John Doe. This is a better solution but tends to suggest that you did not have the time to actually sign the document. It is also not as sincere as an actual signature.
- Printing out the cover letter, signing it, and then scanning it back in. This wastes a ton of time, especially if you have a large number of applications to send out.
None of these are ideal.
The Ideal Solution: an Electronic Version of Your Handwritten Signature
The ideal solution is to create an electronic version of your handwritten signature. This is an incredibly easy process that we have reduced to five straightforward steps.
Here’s what you will need:
- Camera Phone
- Microsoft Paint
- Microsoft Word (this tutorial uses Word 2010)
Step One: Write Your Signature on a White Sheet of Paper
Sign your name in the middle of a regular sheet of white paper. You will achieve best results with a pen that produces thicker ink, such as a Sharpie pen.
Step Two: Take a Picture of Your Signature
Use your phone to take a picture of your signature. Try to get as close as possible, and find a position that does not cast a shadow on the sheet of paper. Note: if you have a scanner, you can just scan the paper in and skip some of the following steps.

You then need to get the photo from your phone to your computer. You can do this simply by emailing the photo to yourself, selecting “actual size” when prompted.
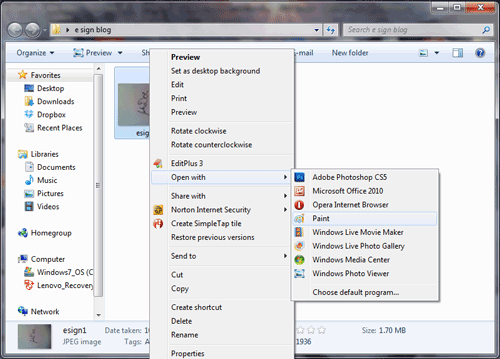
Step Three: Edit Your Photo in Microsoft Paint
Open your image in Microsoft paint by right clicking on the icon and selecting “Open With.”
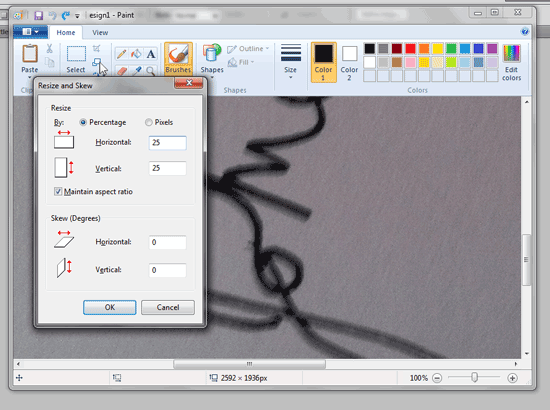
After opening the photo, you will notice that it is huge and rotated on its side.
First, click the resize button as shown in the following photo. Then resize by percentage, reducing the size from 100% to 25% as shown.
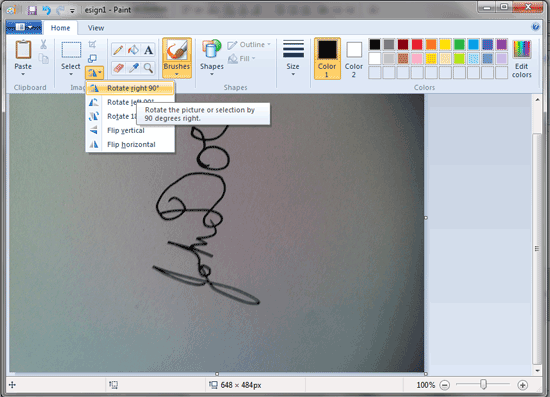
After making the photo smaller, select the rotate button and choose “Rotate right 90 degrees” as shown.
Next, you will notice that the paper itself takes up most of your photo. Select only the signature area using the rectangular select tool. Then press the Crop button as shown.
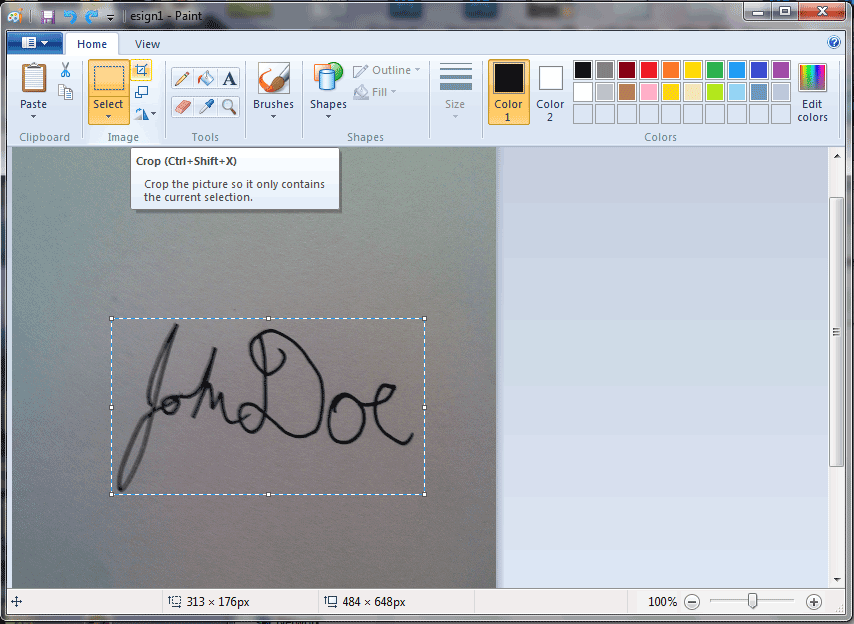
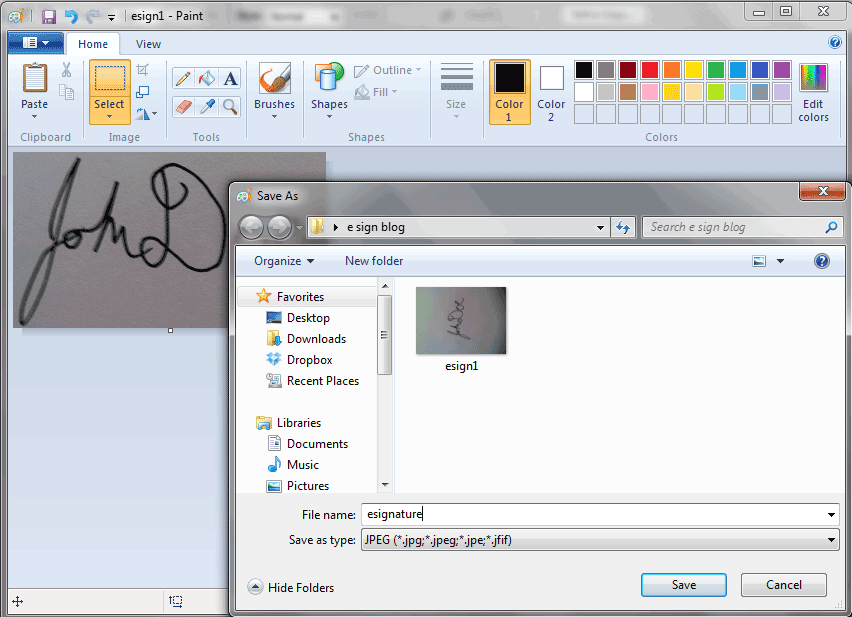
After cropping the photo, save your photo as a JPEG image.
Step Four: Eliminate the Dark Background in Microsoft Word
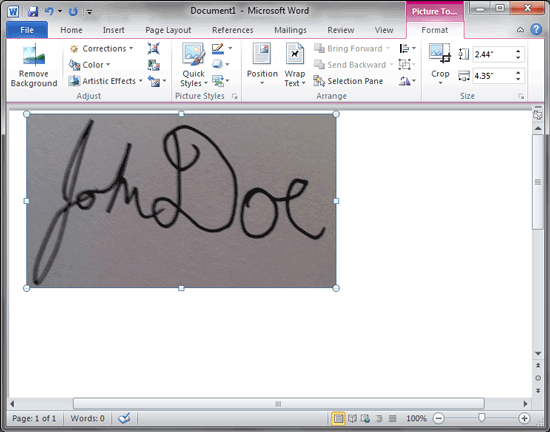
Open up Microsoft Word. Under the Insert tab, select Picture and choose the edited photo that you saved from Microsoft Paint. This is what the image will look like. As you can see, we still have the dark background from the shadows on the paper itself.
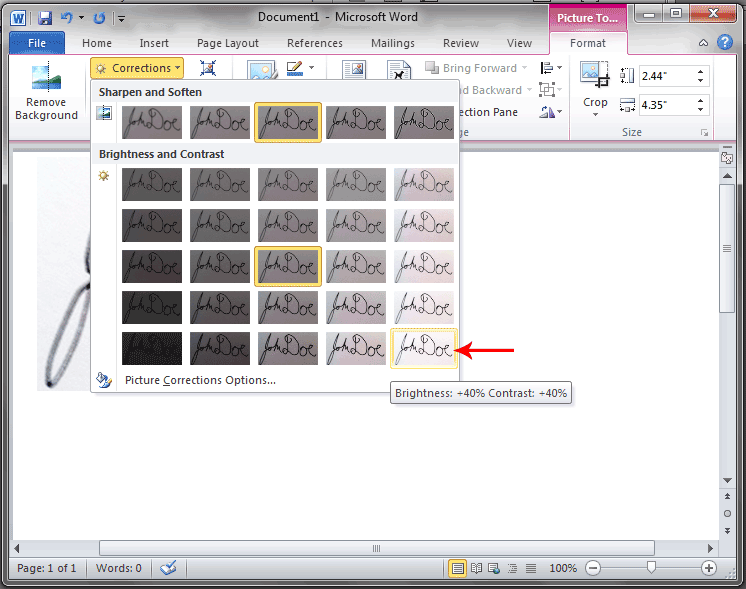
To remove the dark background area, click on the Photo and then select the Corrections menu. Select the option with the whitest background, as shown below.
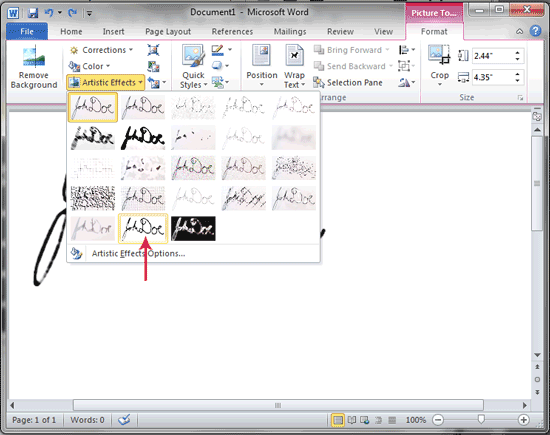
Next, select the photo and open the Artistic Effects menu. Select the option that has the whitest background as shown.
Note: if these two steps do not completely remove the background, then click on the Corrections menu and then choose Picture Corrections Options. Play with the brightness and contrast sliders until the background is completely white.
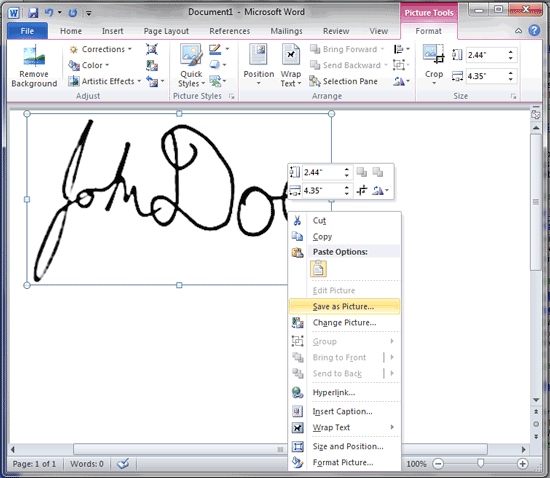
The end result is shown in the picture below. Right click on it and choose Save as Picture.
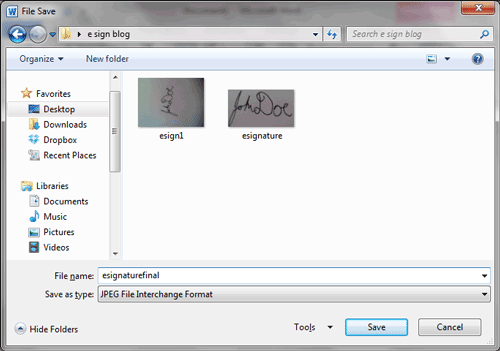
When saving your signature, make sure it is in JPEG format as shown below.
The final result will be a signature image as shown below.

Step Five: Insert Your Final Signature Into Microsoft Word Whenever You Need to Sign Anything!
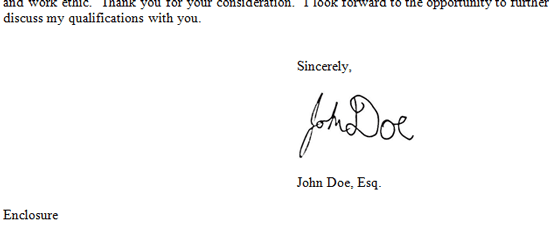
After importing your signature into your cover letter, resize it so it is smaller and matches the rest of the text. Here is the end result.
You can now import your signature into any document that you need to sign. Please comment if you have any questions. Good luck!